![]()
|
" The most accurate repairs in the world" ..... Its not bragging when you can back it up ! We are happy to answer any of your questions or concerns ,call or text 586-246-4500
|
|
|
|
|
|
|
Motorcycle Frame Misalignment
Ways You can Check it Yourself
Here is a method of checking frame twist by comparing the alignment of your your wheels, rear to front. .
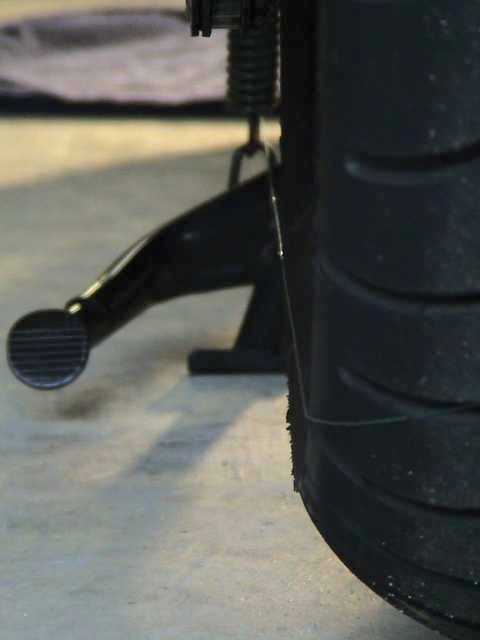
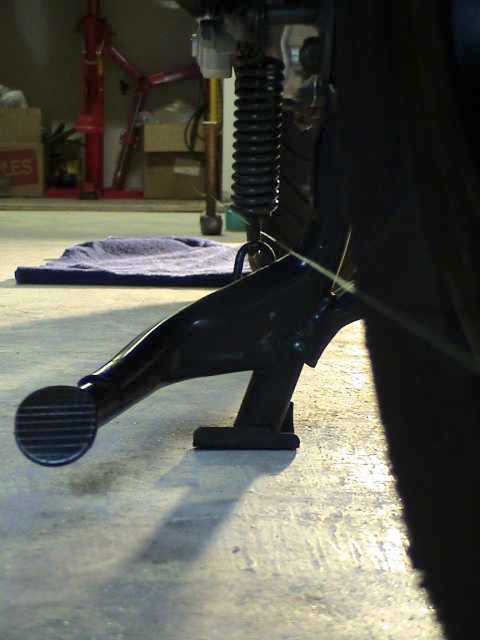
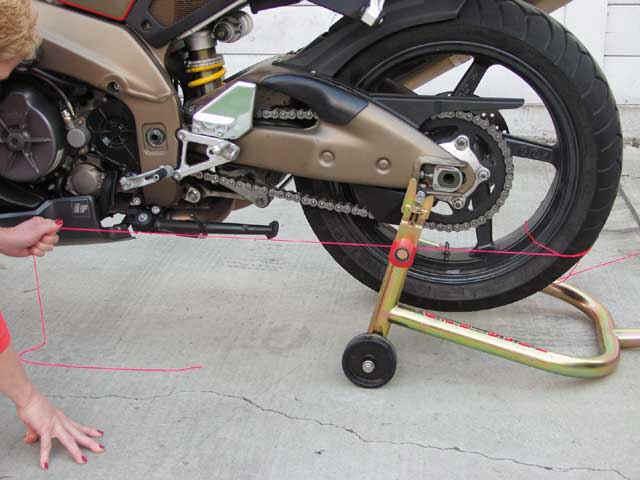
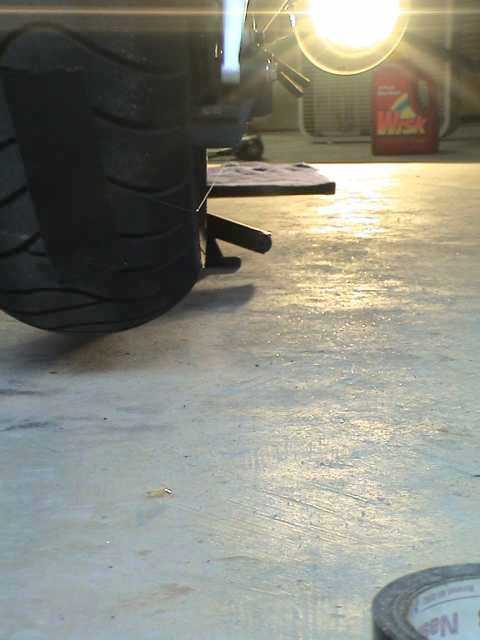
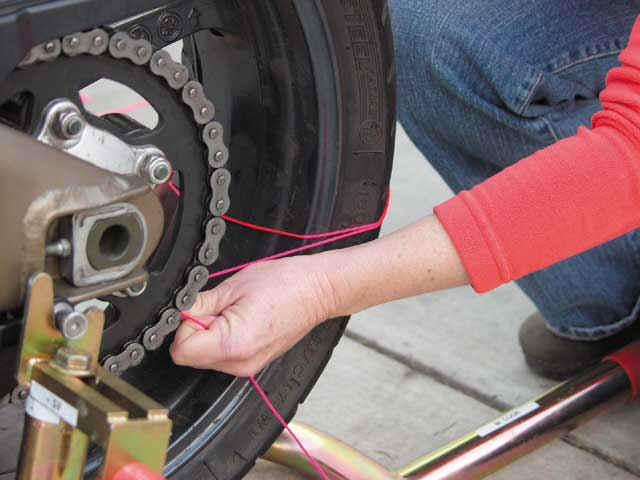
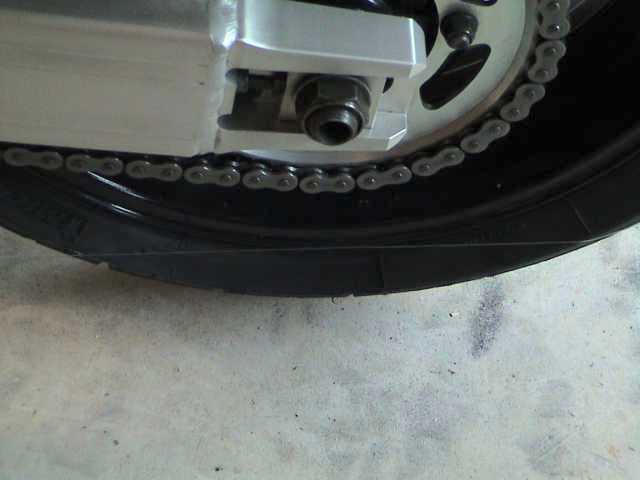
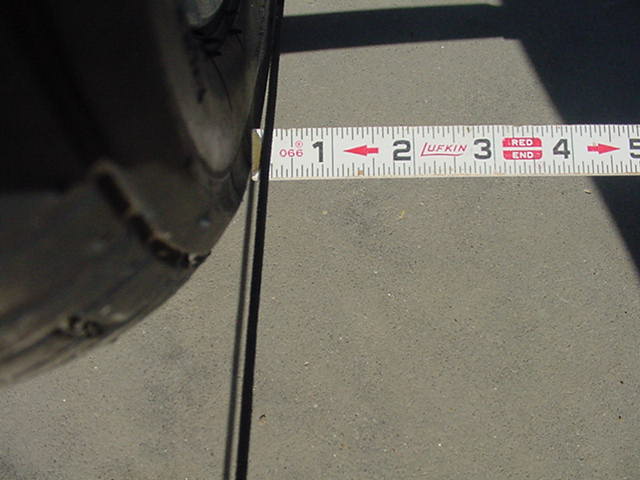
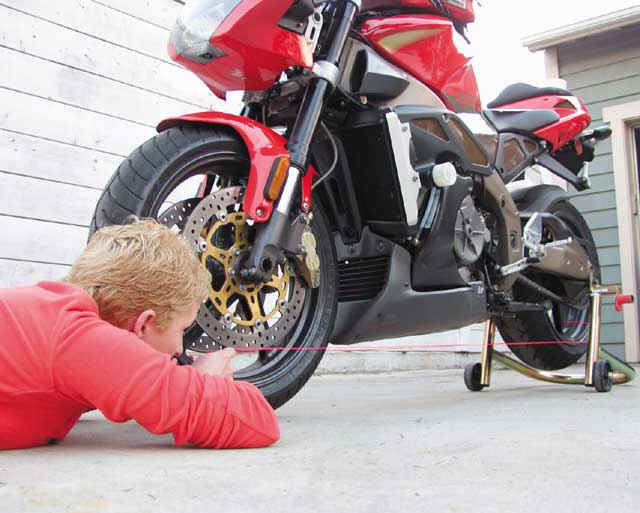
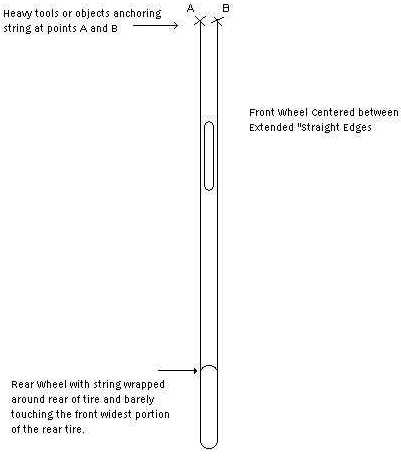
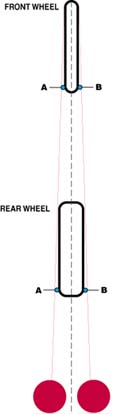
Steps: Important....Make sure that 1. The motorcycle wheels are straight and true. 2. You use a tape measure from the Swing arm Pivot bolt to rear axel. This will insure the rear wheel is perpendicular to the swing arm pivot. (You can not always trust the Manufactures marks for the rear axel position) 3. The forks and triple clamp system is straight and true. 4. There is proper per load on steering head bearings Place the motorcycle on flat level ground on it's center stand if it has one. If it doesn't, then use a swing arm pit stand or I've also used 2 automotive safety stands under the foot peg holder. Be mindful not to use it on a folding foot peg. Place transmission in gear to prevent rear wheel from spinning. Next, attach one end of the line to a heavy tool like a 2.5 lb hand sledge hammer, or one gallon plastic milk jugs filled with water works well . Now, measure off about 12 ft. or so of line and cut it. Place one heavy object with one end of the line attached to it on the ground a few feet ahead of the front wheel and slightly off to the side. Run the other end of the string along side the motorcycle then around the rear tire. Be careful, the string line should not contact anything other than the rear tire. If it is fouled by the center stand or work stand, then your straight edge is no longer straight. If you are careful in selecting the line's path and use the supplied pictures as examples, you should be able to run the line between the swing arm spring and the swing arm and not have any fouling to alter the "extended straight edge".
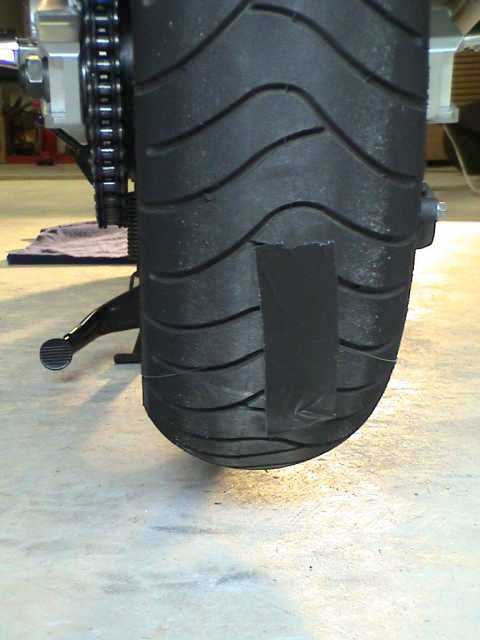
Use a piece of duct tape to secure the string to the rear tire and run the remainder of the string up along the other side of the motorcycle and past the front wheel. Attach another heavy weight to the free end
Now, remove any slack the lines have in them on both sides.
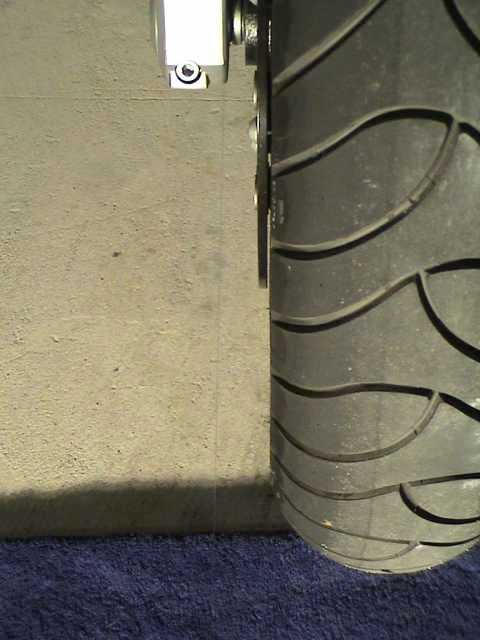
Go back to the rear wheel and take a look at the string at the widest point of
the front portion of the rear tire. Move the strings in front of the bike on
both sides until the string is barely touching the rear tire where it passes
the front widest portion of the rear tire. What you are doing is creating a
"straight edge" and placing it along both sides of the rear tire and
extending that line past the front wheel. When you have all of this set up,
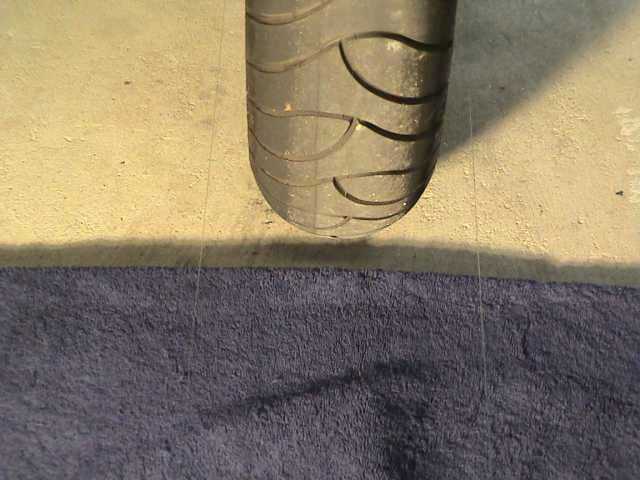
then the front wheel should be perfectly centered between the two strings
passing the front wheel. If if isn't centered, then carefully lift or slide
the front wheel to center it between those two strings. With the front wheel
centered and pointing straight ahead so the distance is the same on both sides
of the front widest portion of the front tire and the rear widest portion of
the front tire then go back to the rear wheel and see where the strings touch
the rear tire.
The distance should be the same on both sides of the front tire at 4 separate points. Right and left front widest portion and right and left rear of front tire widest portion.
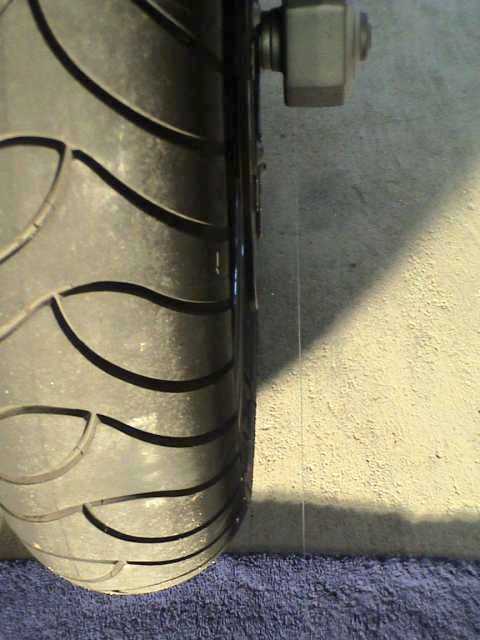
When the front wheel is centered between the two string lines, the string should be barely touching the widest portion of the front section of the rear tire on both sides of the motorcycle. If it is not, then use the procedure to adjust chain slack or tension. It's quite possible that when you loosen the axle and axle adjustment nuts and bolts, you will disturb the string lines and may have to reset them up. Do not over tighten the chain. Remember, the axle adjuster bolt pushes the axle back on the side it is on. As an example, if there is a gap between the string and tire on the chain side, you will most likely have to move to the other side (brake side) adjuster and loosen it so the axle can be pushed forward on the side opposite of the chain and where the gap exists. When you are confident you have the chain slack and alignment properly adjusted, recheck all points of your string line prior to and after tightening all nuts and bolts. When you have aligned the wheels in this method, you should not have to do it again until the rear tire is changed. In addition, when adjusting the chain tension you should only need to loosen the axle nut enough to allow minimal movement. Then turn each axle adjuster bolt the same amount. I use one "flat" or 1/6th of a turn each side. Rarely do I need to turn it more than two flats when I adjust chain slack and this is about every 2000-3000 miles or once, maybe twice between tire changes. Hopefully, this has been helpful.
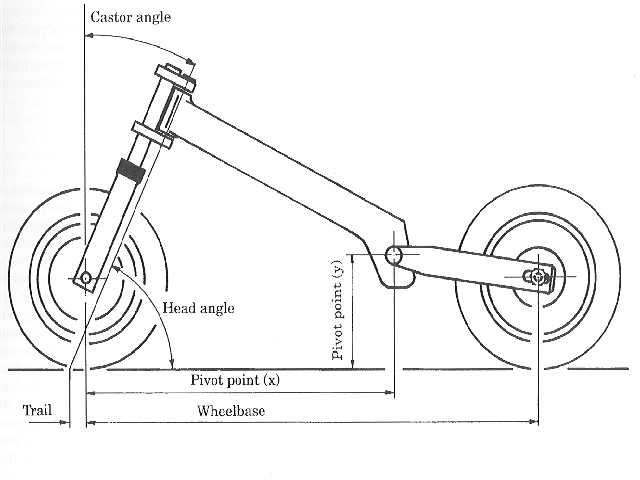
Steering Head Rake Angle
You can Check it Yourself
Coming soon
F.Y.I.
|
|
|
|